Automation 1: Mail Merge
Time to learn: 20 minutes
Need to send out a standardised form to dozens of your customers? Hundreds? Thousands? Feeling the cramp in your fingers from typing out the same form over and over? Even good old copy and paste ain’t enough?
From the interconnectivity of Microsoft’s Word and Excel comes an amazing step in office automation – the Mail Merge.
What you are going to learn here will make you WORSHIPPED.
Let’s start with some data.

This is a list of a 12 name customer database. You will see that we have 5 columns of information – ‘Salutation’, ‘Name’, ‘Address’, ‘Membership Points’ and ‘Bonus Points Remaining’.
How are we going to create a standardised form with all this data without using copy and paste 60 times?
Step 1: Ensure that all your data columns have TITLES. This is essential when using the Mail Merge. Save your data in an Excel file. I have called mine ‘Mail Merge’. Remember that all your data is in Sheet 1 – you will see why later.
Step 2:
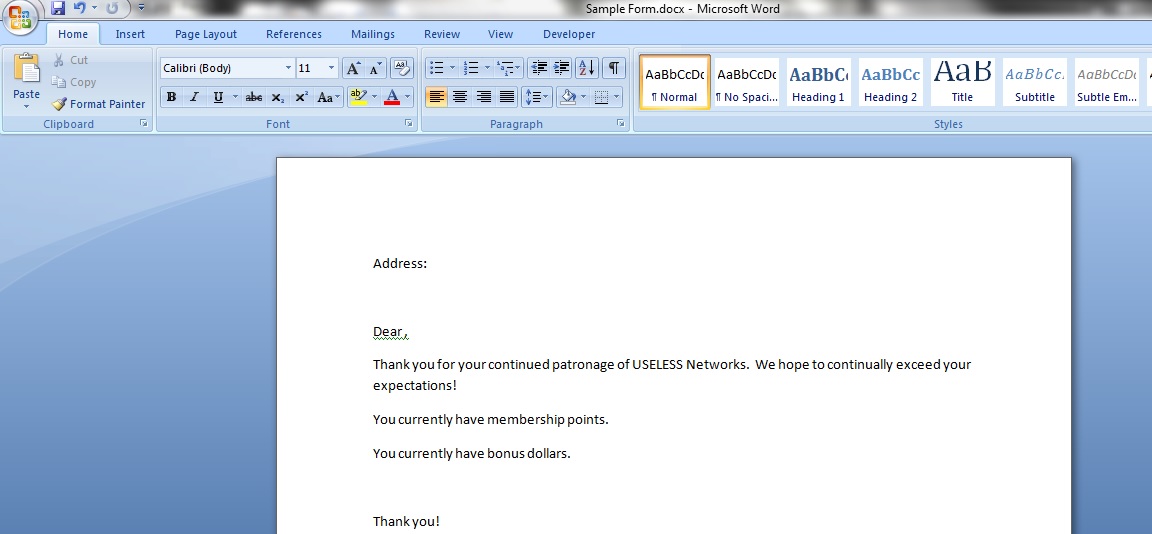
Here we have a standardised template for mailing to your customers – just use Word and type anything you want, really!
Step 3:

Now, in Word, go to the ‘Mailings’ tab, select ‘Select Recipients’ and click on ‘Use Existing List’.
Step 4:
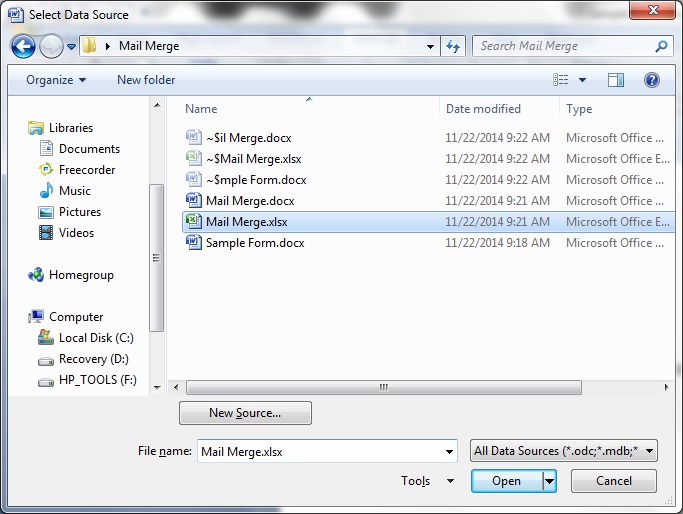
You are still in Word, right? Good. Go to the location of your Excel file and select it. Click ‘Open’
Step 5:
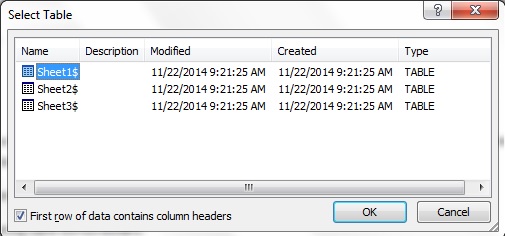
You will see an option box like this. Select ‘Sheet 1’, as that is where all our data is and click ‘OK’. By doing this, Word now knows where to get the essential data from.
Step 6:

Now, in Word, return to the ‘Mailings’ tab and you will see that the option ‘Insert Merge Field’ has become available.
Step 7: Select ‘Insert Merge Field’ and you will see a selection of all our column data titles (‘Salutation’, ‘Name’, ‘Address’, ‘Membership Points’ and ‘Bonus Points Remaining’) from our ‘Mail Merge’ Excel file!
Step 8:

Now, all you have to do is select where you want to place the fields. Click on the spot you want to place the data field and then select ‘Insert Merge Field’ and click on the data field you want! Easy! Notice that as you place the merge fields, their names appear framed by <<>>, like <<Address>> and <<Salutation>>.
Step 9:
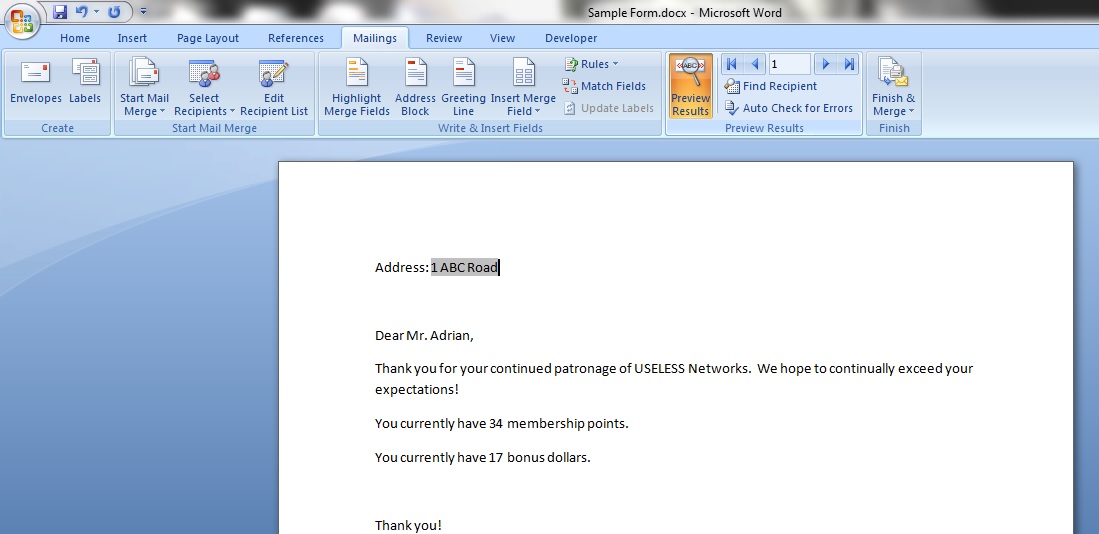
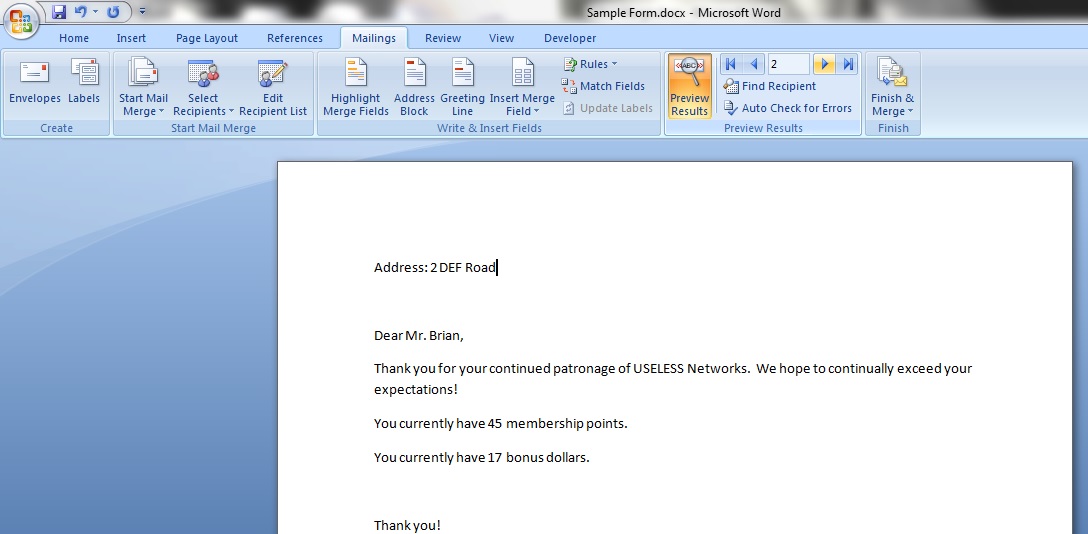
Once you are done, click on ‘Preview Results’. See that the data we have from the ‘Mail Merge’ Excel file has been instantly transferred to the positions we wanted onto the Word document? Are those tears in your eyes?
Step 10:
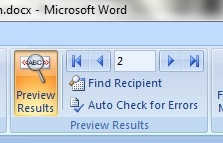
Next to the ‘Preview Results’ button, there are some arrows. Click on the single arrow facing right. Notice that the number in that little box on the left of the arrow has changed from ‘1’ to ‘2’.
Notice also that the information in the Word document has now changed from the details of the first customer in the ‘Mail Merge’ Excel file to the second customer? You can select which customer’s details appear on the Word document by scrolling left and right in this manner.
Step 11: You can print these documents one by one if you wish, but there is another way to make it much faster.
Step 12:
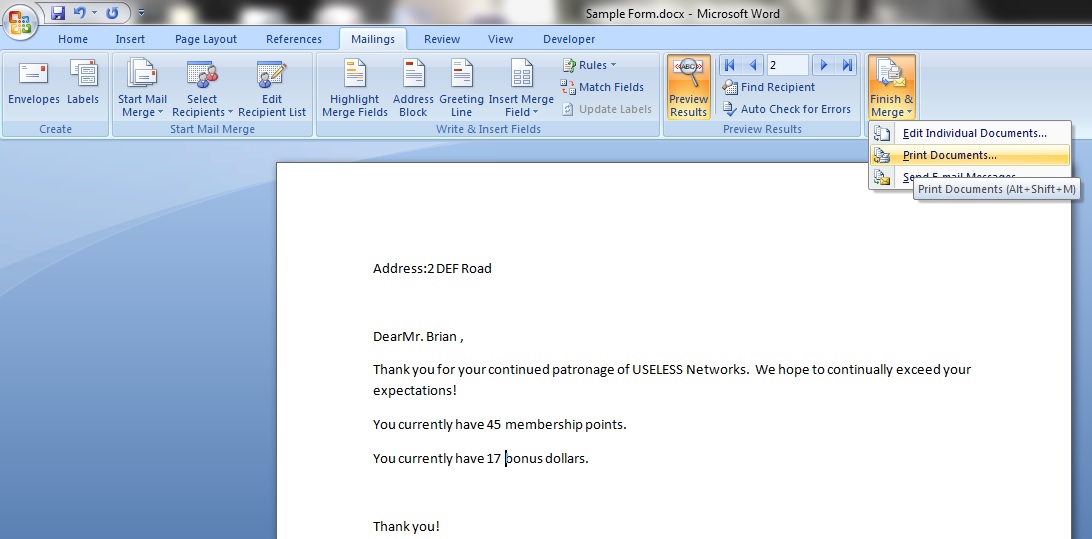
Select the ‘Finish and Merge’ button and select ‘Print Documents’.
Step 13:
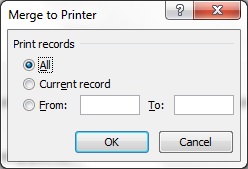
An option box will appear with 3 options. ‘All’ will print all the records in your Excel file, ‘Current Record’ will print only the one you have on your screen now and ‘From; To’ will allow you to specify the specific range of records, maybe 1 to 3 or 10 to 12.
Tip:

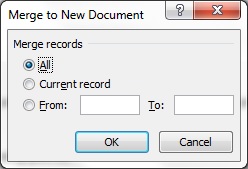
You might like to see all the documents for a proof read before you print. You can do this by selecting the ‘Finish and Merge’ button and clicking on the ‘Edit Individual Documents’. You will see the same option box in Step 13, but instead of printing the records selected, Word will display them all for your inspection.
You are now a one man army.

Leave a comment